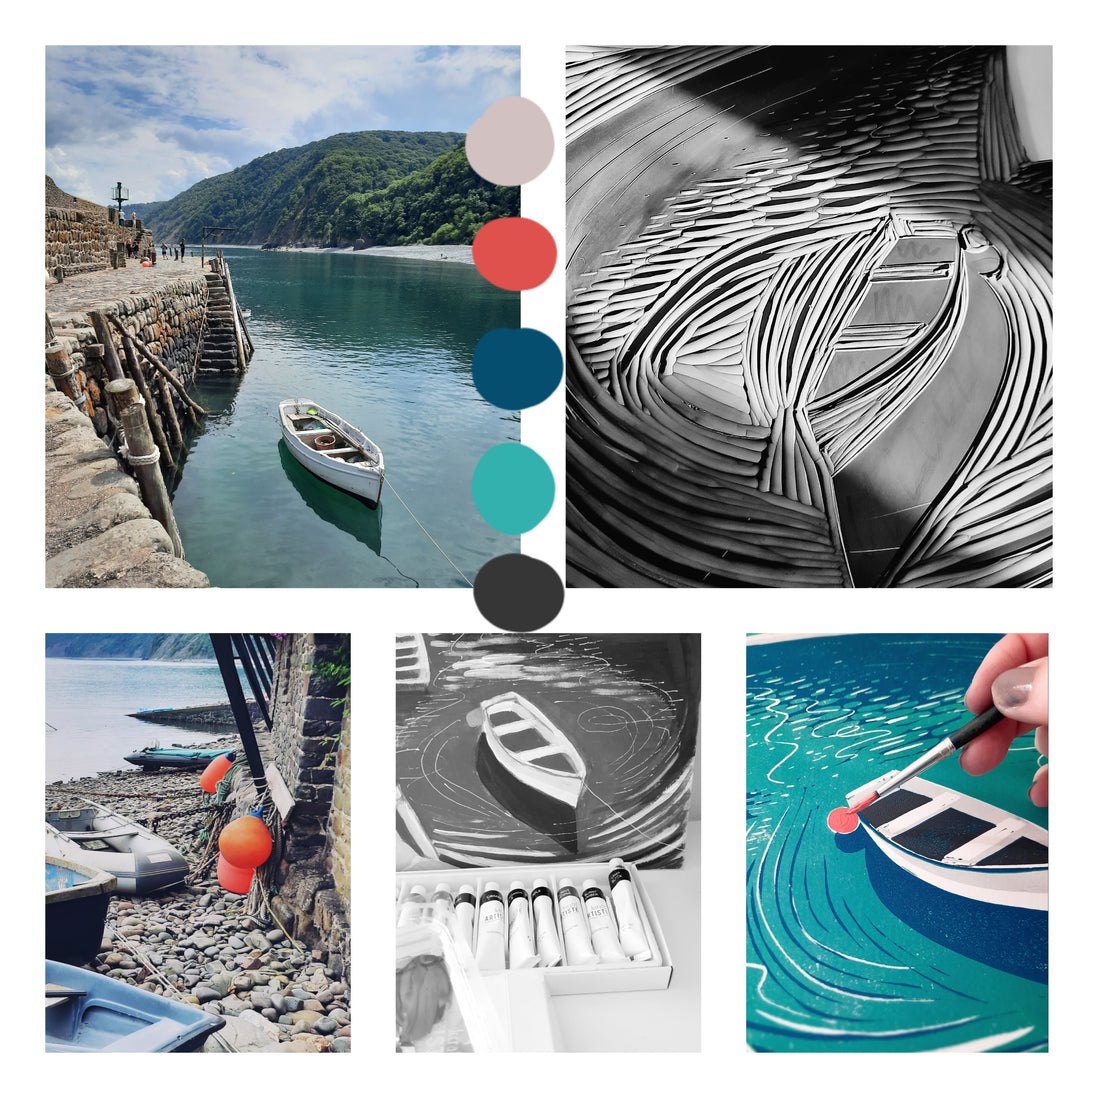
'Safe Haven' is one of my newest prints and largest to date. Let me share with you more about the inspiration for the print and the processes involved in its creation.
INSPIRATION
'Safe Haven' was inspired by a visit to Clovelly during a holiday to North Devon last June. This beautiful little fishing village was full of inspiration, especially down by the harbour with its boats and lobster pots. We had walked all the way from Brownsham through stunning woodland, bringing us out at a sweet little beach called Mouthmill beach. From here we set off uphill to rejoin the coast path, this part of the walk was quite challenging but the views were worth the effort. We eventually made it to Clovelly with its steep and winding streets, it was full of charm and history which we loved! We had some refreshments from the Red Lion Hotel and sat overlooking the beach. I thoroughly recommend coming here out of season like we did, as I'm sure it can get very busy in the Summer.

Mouthmill beach

Clovelly Harbour from up high

Drinks with a view
We explored the harbour further and I took lots of photos for reference. The weather was starting to cloud up and the sea turned this gorgeous green. This photo would also make an amazing print - one for the future!

Clovelly Harbour

A similar view, 1906 *

Boat in the harbour
THE PROCESS
Once I had decided which photograph would be my main point of reference, I sketched out the idea and painted it to scale using gouache and acrylics. I painted each colour layer from lightest to darkest to help me visualise how each printed layer would work and what would need carving from the block each time - remembering to utilise the white of the paper. I never usually plan out my prints this well, but I was trialing using high quality papers for the first time and didn't want anything to go wrong. Even with this planning, I still made a few changes as I went along.

The painted idea on card
The print was made of 4 layers from the same block, making it a reduction print. You are left with what will most likely be your darkest layer which in this instance is the dark grey I used for the wall of the harbour, shadows in the boat and on the cliffs as well as the rope in the foreground. To make my life easier, I decide to cut off the wall area part of the block (on the left hand side) to be carved separately and printed at the end. I would call this reduction jigsaw printing.. I should also mention that this were all pressed by hand, as my A3 press wasn't big enough for the design, so quite a workout!

Layers 1 to 4
The final touch for this print was a pop of colour. I took this vibrant coral pink from one of the buoys in the harbour to add into my design. Rather than figuring out how to print this as part of the reduction (too complicated in my mind) I decided to just paint it in, along with a couple of brush strokes on a life ring added to the harbour wall. It is subtle, but effective.

Colour reference, lino block and the final touches

The final print - 'Safe Haven'
And there we have it, the final print. It really was a pleasure to create! I decided to call it 'Safe Haven' - a place of safety and refuge for this little boat within the harbour walls like so many before it. It is a limited edition of just 10, you can take a look at it here in my shop.
* Image credit- National Maritime Museum, Greenwich, London

